5.31.2024

Roland TD27kv2 drums ekit; replace stock clutch with drop clutch, muffle hihat clomp noise, adjust phones gain.

 I had to pack away my acoustic kit when covid was a thing & had to buy an ekit. A homebrew frankenstein kit off craigslist. It had a dm10 module & the worst excuse for a hihat.

I always got into a bad mood when the hats would constantly glitch right when i find a groove. I finally decided to buy a better ekit with supposedly the best hihat around.

However, right out of the box i had new issues.


First: apparently, they tried to make the clutch on the hats permanently installed with a set screw & threadlocker.

I got rid of that fucking thing right the fuck away.

The set screw is not a hex at all, i had tried 2mm, 2.5mm, 5/64, 3/32, eventually i realized it was a T8 star/torx bit. I also heated their threadlocking liquid with a lighter for 15 seconds.

The wingnut section of the clutch then spins off counterclockwise with no tools. You have to force past the 2 bad threads damaged by the set screw...but a few fwd/bwd rotations will smooth it out some.

I installed my Dixon Magnetic clutch, which fit perfectly. The hats have the same concave triangle shape under the hole as the other cymbals, but since theres those x2 left & right cables attaching it to the bottom hat, it was never going to spin anywhere, a thick small felt takes up the gap just fine, compressing into shape.


The slosh spring doesnt fit on these though, they did on my single alesis hat pad.

I modified a 3/4ODx1.25H compression spring to be wider at the base, reducing max load & crush height. I used a thin 3/4ID nylon washer under that but it was actually closer to 9/16 so i had to ream it with a dremel to .7 since the plunger was .69 & i wanted to avoid wobbling. I added a thicker 3/8ID nylon washer above the spring snug to the hh stands' stem, with a thin soft felt to top it off.

Left is the dixon slosh spring, right is the store bought spring unmodded, center (installed) is the modded spring final assembly.

I called a few spring companies to inquire about a professionally fabricated version, but most didnt answer the phone, some said they couldnt do it, one asshole said he'd make it for $700 each.

heres a simple demo vid i made, (not trying to show off any chops so fuck off) first is the acoustic sound with no module sounds, the 2nd is the same vid with no acoustic & all module sounds.


2nd: the clomping of the 2 piece hihats was loud as shit. I can differentiate the thunk of the pedal vs the top hat hitting the bottom hat because ive used different hats on this same pedal.

There was one guy online who glued triangles of foam on the bottom lip but he says it was a failure. 

My solution was a fucking 1st try homerun. I was looking at my sweatband laying nearby the kit & thought i could make a big sweatband for the bottom hat to dampen the noise.

I did a little research & looked at my options online & a local fabric shop after almost making the prototype out of a microfiber terry towel (probably would have worked but i only had white & wanted to use black to minimize contrast on the kit).

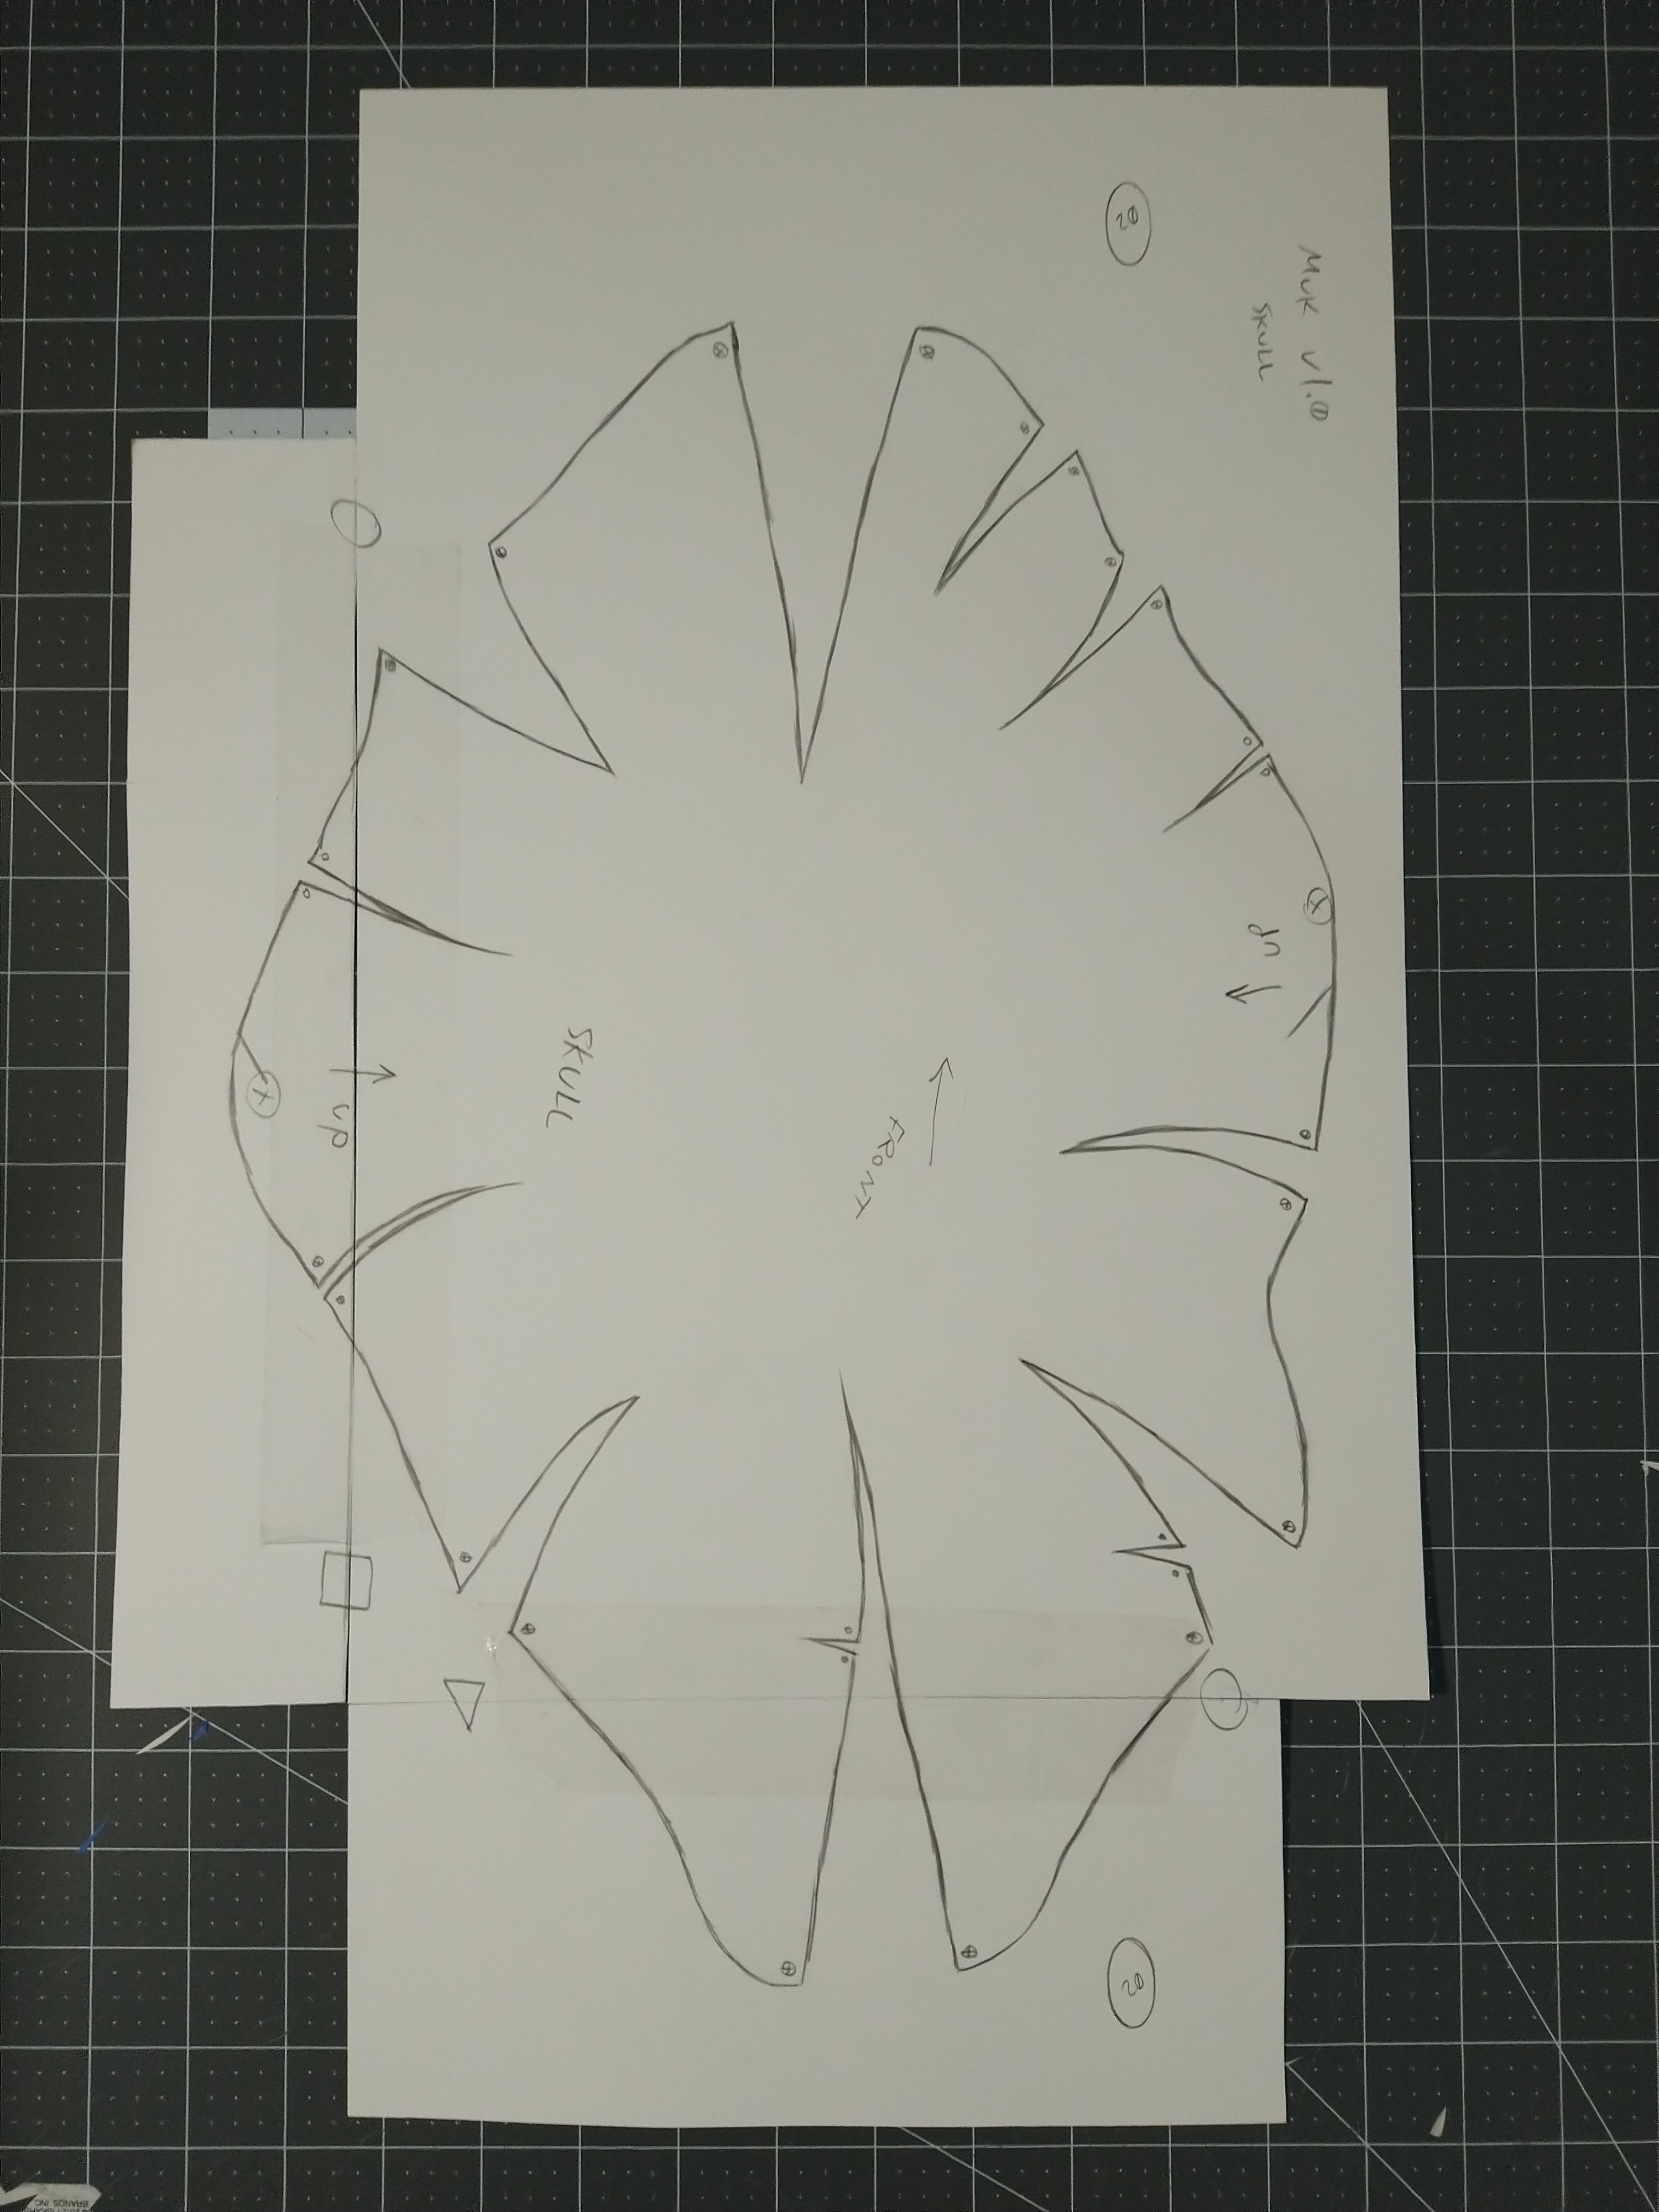
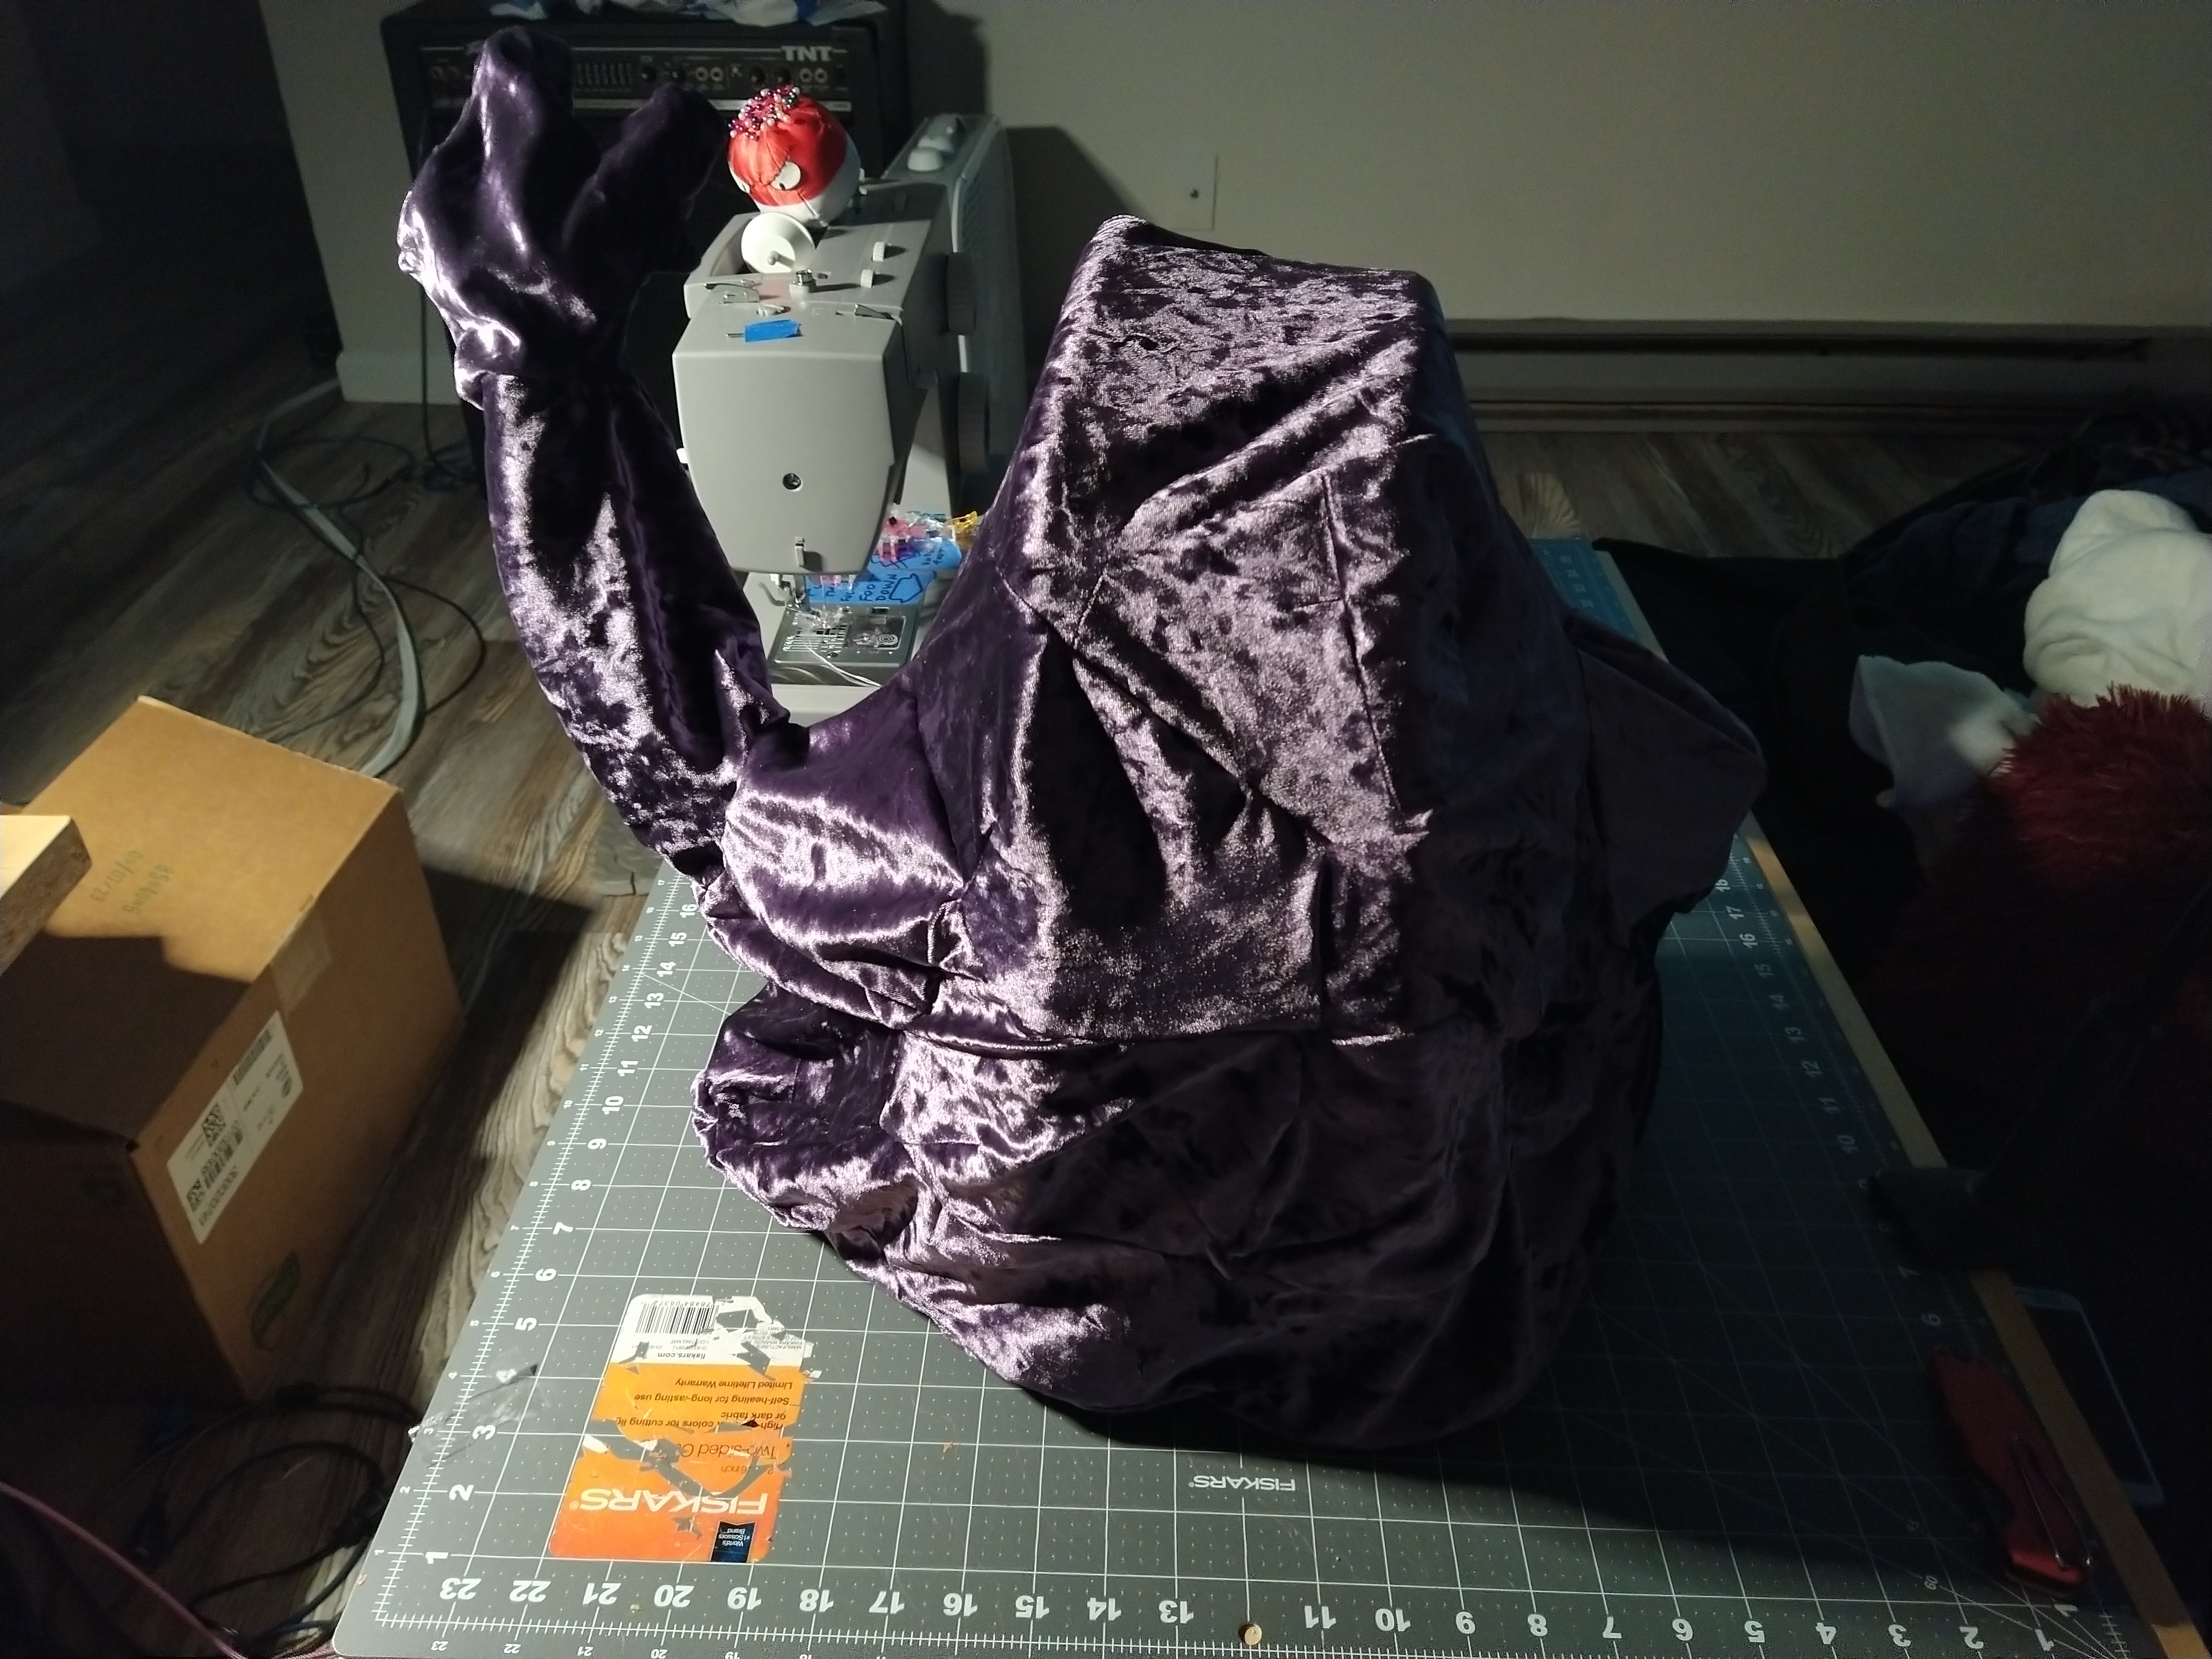
I wanted something fluffy but elastic, i ended up finding a black sherpa fabric with 1way stretch!

I traced the bottom hat 2x, cut both pieces out, cut out the centers, leaving x2 approx 2" rings, then sewed those together with a single backstitch -nap facing out (i didnt sew it inside out so there wouldnt be a bunched up seam along the hat edge).


It completely eliminated the clomping when footing/chicking the hats, & didnt affect playability at all, if anything, it improved the feel (the rubber on rubber sent a frictiony vibration down through the stand).

The stand does have its own noise, & i think the slosh spring needs some fine tuning so it doesnt accidentally rub against itself while fully compressing because my bends werent machine perfect, but its still way quieter than NOT having the sherpa wrap on it..


3rd: the fucking cymbals with the concave triangle design around the mounting holes require special triangle rotation stop mounts...these mounts are permanently glued or molded to the shitty balljoint tilter arms on the stock rack stand... roland does sell removeable versions for a stupid profit, but i found a 3D print file online for free, & i have a 3D printer, so i made those myself. I bought m3 hardware to install them on my cymbal stands. it would be better in resin, i only have a filament printer & sort of opened a tiny seam by tightening the 1st one too much.


(These cymbals have a stupid layout design, theyre actually heavier on the "back" end, the opposite side of the sensor half of the pad. This means theyll tilt AWAY from you unless you turn the tilters damn near sideways...)

As long as you dont overtighten them, theyre fine. & i can always print a replacement in 30 mins.


4th: the phones output was quiet as hell.. the alesis dm10 used to hurt my ears if i had it above half. 


I went into the Output settings & found i had to increase the phones gain by 10db! Just to drown out the acoustic noise of the kit!

however, when i connected to my daw for the 1st time, i found i had to raise the usb master out gain +15db to get decent level on pc, & to set it up to hear live monitor from pc to play with layered tracks i had to turn the phones gain on the td27 output settings back down to normal (0db) because the monitor volume coming back from pc was not attenuated like it sounded direct from the module.

i tried to remove signal compression from the phones in output settings path but that wasnt the problem & didnt really change it at all.


5th: the snare & hihat cables are like a mile long, they couldve just been like 6 inches. even for a left hand setup im pretty sure you would still keep the snare & hat near the module. 

the cymbal & tom cables are too short by a few inches, a little more length would have allowed for some rack wraps/cable management. as it is, each cable just barely reaches the damn pads like high tension wires. i would have loved to trade all the extra length from the snare/hats to the other pads.

i also confirmed the cable snake 1/4 plugs do work with non-roland piezo pads. i really dont like the puny roland toms/kick.

i kept my custom wood shell kick & dual zone toms.

The stick noise on the new hats is comparable to the noise of the kick beaters, but its so much more realistic & less glitchy than the alesis pad i was using, im enduring it for now.

i read someone suggest holes in the hats would reduce closing resistance & air pockets. after playing for a while, i dont think drilling holes in the bottom hat would affect the feel or sound enough to notice while playing. the person suggesting that didnt try it as far as i could tell.


I couldnt help but expand the kit a bit, its basically the same setup as my acoustic kit setup of choice. 

I added a china cymbal & split the aux1 input between x2 splashes. 

I separated the pad as H/R off, assigning different instr's to each. 

I found that i still got a different sounding edge/bow sound on each splash! What a cool surprise, i thought id only be able to get x1 of the dual triggers on the splash to register on each split of the input.

I also found that setting that split input (aux1) as a "pad2 parameter", instead of the automatically selected "cy12ct parameter" yields better threshold/gain presets.


3.03.2024

comicfury logo alternative

 so its public info that comicfurys owner Kyo currently collects a rough sum of $1600 monthly in donations from a bunch of the creators that use this free site.

i have a website domain that i pay less than $20 annually to own. 

as far as i can tell, the site hasnt changed much since it was started before 2010, where is all that money going? is Kyo just living off of the dreams of desperate aspiring creators?

i dont know, maybe. i do know Kyo did not like my proposed alternative logo...


 i know it wont make a difference if i choose not to host my work there, but like everything else in my life that only hurts me, im making that choice out of principle.

(god not to mention the literal flood of daily spam from people fighting to stay at the top of the feed..)

the ratings are a fucking joke & actually rigged. the moderators deleted all of my low ratings but left my high ratings, reinforcing the spammers crap. its like the fuckin bogus edited ratings on Rotten Tomatoes.

2.29.2024

Animating a gif on clipstudio

 this is my first serious attempt at any sort of animation. not really any prior knowledge besides theoretical speculation, there are surely much better techniques/methods to accomplish what i stumbled through, but every tutorial/instructional vid i found was overproduced clickbait bullshit, so i just winged it.

the main thing that was confusing me was clipstudio's layer/cel/frame naming system. in retrospect it does make sense, but its not intuitive after using the typical illustration layer system for so long.

making new cels is simple enough, but when you need to duplicate an older cel & move it, you cant just drag it. clipstudio animation workspace requires you manually rename the layer. you decide on the name by referencing the existing name of an empty cel you must create on the timeline ahead of time. once that empty cel has been created, you delete it, then rename your duplicated layer to whatever that deleted cel was named, then that renamed layer will become that deleted cel's replacement, automatically taking its' place on the timeline.

the deceitful alternative to this is using Alt to drag the frame to be copied & dragging to its additional placement. however this method is not a seperate duplicate, that is, a copy made with Alt cannot be edited independently of its parent frame. any edit done to any of the "alt-drag" copies will be synchronized across each parent/child frame. this may have useful applications, but for the purpose of duplicating for slightly changing or adjusting the child frame, the renaming method is more effective.

when doing normal illustration, i usually never use my keyboard or any external shortcut button device, i program the shortcut buttons i need to the buttons on the monitor tablet i draw on.

doing animation, i now need to keep the numpad handy at least while doing the initial roughs.

animation folders are also an interesting tool, each animation folder will only let you edit x1 cel per frame, so overlapping items/characters should be seperated into their own animation folders to make editing way easier. out of habit i drew the entire first frame on x1 layer, then had to seperate them later into: hair, hand, bg 1, bg 2 etc.

once you have existing drawn cels, you actually can drag those around to adjust the speed of any given motions or overall playback speed.

frustratingly, theres apparently no way to adjust the playback to simply review your work in slow motion. then if you arrange your timeline to play slower for this purpose, its not a simple button press to speed it back up to normal, so basically you are stuck reviewing your animation at regular speed.


My first inking attempt failed because i drew every frame, which looks jittery & unnatural. i learned it was better to duplicate then modify consecutive frames.


still jittery...
but i feel better about this version, & i learned alot. 

i learned that bad frames & good timing can look better than good frames & bad timing.

timing placement is not the same as frame timing. even if you plan to draw lets say 5 particular frames, the perceived time of the occurrence of each frame can change drastically by separating or clustering those same frames either intentionally or unintentionally, so then should be considered carefully during the storyboard phase or notated in advance.

i really spent alot of time adjusting frame placement on the timeline for different movement speeds.
also, the idea that all the items with movement should not be synchronized, that is, offsetting frames so that some frames reach a "hold" or resting position while others move, for example: allowing the breath action to finish just after the blink action begins instead of exactly where they end/begin respectively.

theres another theory about rocking motion or bouncing motion that i incorporated into the head. its something i had read about in Timing for Animation by harold whitaker & john halas that basically talks about how an object rooted in some way that is in motion will have an opposite return motion even if almost imperceptible or may have several rebounds in both or more directions depending on the strength of the force influencing the motion & the weight of the object & manner of rooting or anchoring.
i basically noticed the head looked odd taking a bite & coming to a hard stop, so i added a bit of bobbing. it also suggests a swallowing action.

lastly, regarding gif loop animations, i found an elegant solution to the hurdle of matching the last frame to 1st frame with onion skin. simply copying the 1st frame & placing it at the end of the timeline provides you with the next onion skin required to match for a loop. you also need to adjust for this timing by shifting all other frames the same fraction of time earlier to maintain mechanical precision. since i was animating natural motions, i did not feel the need to adjust too precisely for this.

edit: i guess you could also duplicate the first frame after the end of the timeline for the same effect & avoid other accompanying edits. 

2.21.2024

High Resolution PNG 2D lineart shapes template

 Because apparently its impossible to create a tablet drawing app capable of creating a perfect polygon with adjustable number of vertices, & because apparently theres cocksuckers on this planet who think they can get away with charging mfs a dollar for a fucking hexagon thats bigger than 5 pixels or not watermarked.

I made this huge 600dpi template that anyone can download, & you can "select" your shape, copy/paste, then adjust size or stroke for outline thickness, or fill, or change color, whatever.

for free. Here you go.


2.04.2024

custom Muk plush


These are the reference images i used, i wasnt sure if it was going to be more or less difficult than the gengar was, i thought since it was essentially amorphous it would be more forgiving, but i knew since it was asymmetrical, it would be 2x as much work at minimum.


 The first step was roughing in the form with paper & tape. The 1st version i wont even share, it looked closer to a bulbasaur. I had to really contemplate what defined muks shape. Its more of a head with arms than a blobby body. In retrospect i could have made the hands larger. I also underestimated how much i would have to needle sculpt, & could have simplified several complex shapes.


Next, i had to disassemble into what i thought would be the defined parts.


I tried to place the seams along naturally occuring creases & folds, or where i imagined a layer of dripping slime would be rolling at an edge.


After carefully labeling with names & orientations & proposed dart/cut positions, the next step was to flatten the parts to make the refined paper model. I traced the flattened shapes onto the same thin paper.


I make some last refinements after assembling the 2nd model, then mark any ambiguous borders with match marks. Then its time to transfer onto the final cardstock design sheets.


Next, i cut out all the shapes. Again, i dont cut the seam allowance because its too difficult to maintain the original shapes during cloth transfer, i just eyeball the seams later. They never end up exactly where you want anyway. The most carefully drawn design will still only remain 75% accurate at best.


After transferring & cutting all the cloth parts, its time to start sewing. I hate using pedestrian methods & materials, so i chose to challenge myself again & used some stretchy material with the odd reflective pattern i thought was the closest to what i imagine the surface of a muk would be like.


I used a basic backstitch for all of this, i tested it vs a zigzag & found it was stronger/tighter on this stretchy fabric. 
I also learned i had to pull the bottom fabric away from the machine while keeping the top piece in place because the dogs kept pulling the bottom to the right, fucking up my early seams, & the seams on this design were extra wavy & easy to fuck up.


I used a pic of the model to design the wire frame bones. This was especially tricky & i think i could have still improved it if i cared to spend more energy on it, but it was good enough for what i needed. I still had leftover foam gap filler tubing so i didnt use rubber hose.


I couldnt really accurately design the inside of the mouth until i could suspend the skin on the bones to take measurements to make a rough shape to refine. I also had to partially sew on the inner mouth before i could start stuffing.


I opted for a bluer tongue, i thought a pink tongue would be too kawaii for a muk.


Somehow, even with meticulous planning, my shapes always seem to be slightly mismatched, in this case, the back edge of the tongue was somehow longer than the back edge of the roof of the mouth, even though i made them together & cut them from a mated union. Fuck me, right?


I intended to design my shapes so i only had to needle sculpt the eyes, but i just couldnt leave it. After preliminary stuffing, it just lacked the layered/bulbous effect i was after. I did some eye sculpting but there werent ideal anchor points to work with & the nose bone complicated things, so i compromised.


I made the eyes same as gengar, with white vinyl & sticker pupils. Used pins for placement then hotglued to attach. Then after adding the last of the stuffing i sewed the velcro closure strips to the throat after the roof & tongue were fully sewn to the skin, but only sewn to eachother by 2" in each corner.

Now the payoff, some candids:


Turns out muks are great for getting rid of your trash.


Just dont bug it while its eating..


Dont fall asleep near a wild muk either, especially if youre out of trash..


I imagine muks can dissolve entire bodies in minutes.


Well, heres my x2 starters.
These are the only pokemon i really had an itch to have but wasnt satisfied with the plushes available on the market, so i just had to go out of my way to create them.
I didnt get much of a reaction from people i showed or where i posted online, so i guess i wont be making any more. I guess the next thing i sew will be the clothing for the HoA action figures.

I need to get back to drawing anyway, & finish up HoA ch02.